April 15, 2013

Blogger BOM - Woven Block Tutorial

 
Let's get the next block started!!  This is by no means my design.  I made this block when I joined a quilt-a-long from sewhappygeek.  Go check out her blog and see all the fun stuff going on over there!!  The block is the woven block.  It goes together easily and quickly.  Her block measurements are slightly bigger to make a 12.5" block - so I changed the measurements a bit to make it a 9.5" block.  I have a link to her tutorial as well should any of my communication or pictures confuse you.  As I say at the end of the post - I want this to be fun and I don't want confusion or frustration to keep you from liking this block.  If you need a little more - her tutorial could help or leave me a message and I will do my best to follow up!!


Fabrics and Cutting Instructions:
 
Select 4 Colored Fabrics (I chose 2 greens, 1 yellow and 1 pink)
Select 1 Solid Fabric (I chose white)
 
Cutting the Colored Fabrics
 
From each colored fabric cut:
1 - 3" x 3" square
1 - 3" x 6" rectangle
WARNING: If you are using a directional print (see my green stripe) you want to watch how you cut so the lines or print match as you look up the block.
 
Cutting the Solid Fabric
 
From the solid fabric cut:
4 - 3" x 3" squares
 
Lay the fabric out like the above photo.  You want your solid square fabrics to be the outlying fabric on each side of the square. 
 
Let's start sewing!!
 
Take one print fabric 3" x 3" square and sew to one solid fabric 3" by 3".  CONFESSION TIME: I had to use my seam ripper because I did not watch closely where the solid and printed fabrics needed to be.  Don't be me!!  Double check how they will open after you sew them before choosing which side to sew on!  Anyone else ever do that???

 
If you love to save thread - you can chain stitch all sets of the 3" x 3" squares. 

 
After you sew all 4 square sets and press the seams - bring them back and reassemble the blocks to make sure everything is still looking good.  Now just a couple things:
 
1.  I use excess fabric at times because I want room to trim down and make sure the block looks great.  For anyone of you who hate to waste even an inch of fabric may swoon a bit.  I have just been too close to barely be able to cut up edges before.
 
2.  So when you lay your fabrics down you will have a little extra on the long strip BUT don't panic!! We will clean it up in just a moment!

 
Let's attach the quadarants together now.  See the picture above.  You want to sew the quadarants with the solid white square at the bottom and the long strip on top of it.  If you lift up the fabric like I have in the photo above and you see a printed square - flip it around or you will have to use your seam ripper!!


Now trim the excess off!

 
Press and come back to the table and lay out the four quadarants to make sure everything is assembled correctly.  It should look like just above.  Separate your 4 small blocks you just made down to two blocks on each side and sew.  As an example: On the left side - I brought the yellow fabric block down on top of the pink and green.  See the next photo to see how I laid my blocks on each other.


Now sew across the top.  I would sew across my yellow fabric and on the second block across the green and yellow block.


For some reason blogger won't let me delete this photo - it is in here twice.  Sorry!!

Press and bring back to the table.  Now sew the two long panels together down the middle of the block and press.  This is my block below face down with seams showing


Now bring the block over to the table and trim up your edges.  I had a 10.5" block before I started trimming.  So I took .5" (half an inch) off each side of the block to cut it down to 9.5".
 

And now you are done!!  Great job!  Thanks for stopping by my blog. Explaining in words how to do this is hard so let me know if you have questions and I will do my best to help.  Also - sewhappygeek has a great tutorial so if there is a confusing spot - head over here to her tutorial.  My feelings won't be hurt - I want you to have fun :).  

March 31, 2013

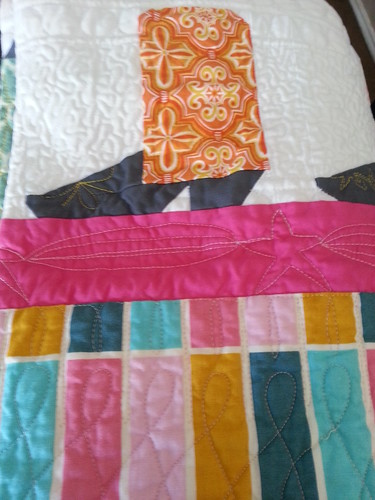
Cowgirl Quilt Up Close

close up quilting by punkrockertracey
close up quilting, a photo by punkrockertracey on Flickr.

Beautiful!!

Cowgirl Quilt

cowboy quilt by punkrockertracey
cowboy quilt, a photo by punkrockertracey on Flickr.

Cowboy quilt completed....well maybe I should call it a cowgirl quilt. The longarm quilter did such a good job!! See the next post for an up close look at the quilting she did on this quilt. The quilt goes up for auction for my non-profit I work at next Saturday. Can't wait to see how much it raises!! Fingers crossed.

March 30, 2013

Off to the Long Arm Quilter

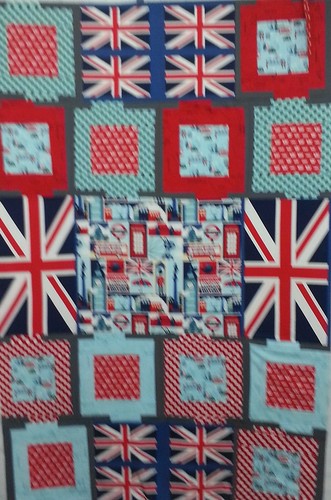
Blurry because I was in a hurry this morning to get this to the quilter. Once it is bound and finished - I promise a better photo. Had to piece this one together and cut off some of the blocks to make it work, but I love it!!

March 28, 2013

We Want the Funk....or maybe not!

Man - I was absent for a long time.  Some of it is a computer that doesn't want to die but doesn't want to work for blogging.  The other was a crafting FUNK of huge proportions.  What happened?  I am not really sure.  I just found myself suddenly avoiding the craft room.  I would go in and turn on the light and then turned back around.  So weird.  Some of it may have been committing to making so many different projects for friends and loved ones.  While it is a joy to sew for others and to see their excitement - I think you begin to miss sewing what you want for you.  It definitely isn't selfish to want to spend some time making things for yourself.  I have a list of items that I want to make for myself and I am working those in between the projects for friends.  It seems to be bringing the balance back.  Here is sneak peek at one item I am really excited about.  I made this for my non-profit I work at for an upcoming fundraiser.  I am really hoping to see the money come in on this one.  It is at the long arm quilter now and I am picking it up this Saturday to complete the hand binding in time for the fundraiser on April 6th. I will post the finished the product when done!  Here is a sneak peek:

I can't take credit for this adorable pattern.  You can find the amazing tutorial from Noelle O Designs here.  Maybe you can make one too!

October 2, 2012

Blogger of the Month Quilt Along

I have been neglecting mentioning an honor at being asked to partcipate in a blog along. There are 12 of us participating - one each month on our blogs. I have the list and will be updating from my mom's computer this weekend. My computer is attempting to die and takes hours to update! I am adding a button to my blog next and will be posting a full post with links and details in case you want to hop from blog to blog and learn a new block eachmonth!! Details this weekend!!

August 30, 2012

Dining Room/Coffee Table Makeover

Before:


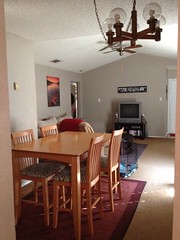
The dining room set and light fixture

We rent and therefore, you can do little changes to your place without taking down walls etc.  Our landlord is great and allows us to paint, etc.  I have hated the light fixture since we moved in. I hate the carpet too, but that's another topic for another day :).  I love our dining room set but always wanted it to be black.  Here is the middle process.  We still need to seal it - but it is almost done. I reupholstered the pads several months ago, but now they look perfect with the set.


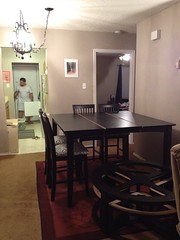
(Ignore the hubs in the background doing laundry!!) The round table is the coffee table, I forgot to take a before photo.  The little triangle around the table are little stools to sit on. I am in the process of changing those too.  The table was brown with leather. I got the table for free from MIL but I hate brown.  So, we are making it work.  Pictures to follow soon of the coffee table.  We also got a new rug:


We got a new run in the living room and moved the gray one to the dining room.  Once the pads are on the stools it will be complete. I still need a gray sectional for the living room but that is one taking some time to find exactly what I want and in our budget range :).


The light fixture up close on the box.  Love this and got it for $25 at Lowe's.  We have placed the old light fixture in the closet should our landlord want it placed back up when we leave (why, I would never know???).  As you can see in the above photos that the hook was placed in a strange place to hang a light fixture.  That is next on the hubs list to move the light fixture actually over the table. It will be so fantastic when it is all complete.

I have some general accessories to still find and I am working on a table runner for the dining room to bring color in. I love black and grays - but I know I need to bring some punch in.  Updates coming as soon as I can find what I like!

August 29, 2012

I did not make these.....

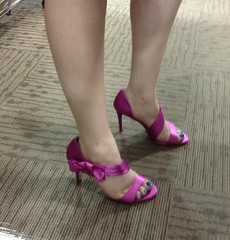
Shoes for a party - hot stuff!

But shoes are an art form to me :).  I had a big party I attended back in July where one of my friends was receiving awards and my non-profit I work for did as well.  So - I got a cute black cocktail dress but needed awesome shoes to bring it up a notch. I had envisioned bright pink shoes and wanted them to be adorable.  Here is the crazy part...... I found them in under 20 minutes for $29.  I walked into DSW, walked around, went to the clearance and saw these shoes.  Tried them on and next thing I knew - I was at the cash register.  My husband had the look of shock on his face as he had snacked and hydrated before leaving the house for an all day marathon for shoe shopping.  These shoes were a hit and women were stopping me left and right to say how much these loved them.  I heart them too!

August 28, 2012

Cute Headband

I bought this cute headband at a small business in Tulsa, OK a few months ago while visiting my mom.  I just love it!  So much that I took a photo at work to text to friends and family. I do work, I promise!!  I am thinking I might need to make a few more to match all of my outfits!

August 27, 2012

I am an artist.....

Well, maybe just a tulip artist.  Some friends asked the hubs and I to join them for a painting class.  What a blast!  You can bring food and wine (which we did - lots of wine) and then the instructor takes you step by step through how to paint the item. You can choose your own colors and I am proud to say I was the only yellow and pink!!   We had a great time....now, where do I hang these??


PS - I am winking - looks like I only have one eye :)


August 26, 2012

For my friend Jen

My friend Jen worked with me for about a year and just recently took a job at another company.  While I was sad to see her go, I knew the new job would fit her so well.....and she loves it!  I made a special mug rug for her to take to her new job.  There is a story behind this mug rug:

I work for a non-proft as a social worker that assists people diagnosed with cancer.  Jen was our activity manager and she also helped arrange speaking engagements to ask for companies to consider work place giving to our organization.  For those who do not know me well - I have always loved Firemen.  I have a weak spot for them and often turn into a hot mess when speaking with one. 

One day, Jen approached me saying that a Fire Department had requested we come out three different days to speak with Firemen and she had thought of me right away.  Now that's a good friend (although my husband might disagree!).  I could only do one of the days - Monday.  So come the weekend before my speaking engagement, my car died and I was stranded at home waiting for a rental car and could not speak Monday. I ended up switching around with Jen and agreed to do Wednesday and she drove me to the speaking engagement - once again - a good friend!!  Well, Jen and my boss took the other two days and they spoke to some pretty hot men.  So, Wednesday rolls around and I am pumped!!  I get there - and not to be mean - but I got the leftovers. I have a strong aversion to mustaches. I always have even since my childhood.  I would say three fourths of the room had mustaches and there wasn't a whole lot of muscle either.  Jen kept saying she was sorry that I got the leftovers and she got the hunks.  There were 2 pieces of eye candy there and I got a wink from one - so that made the day better :)

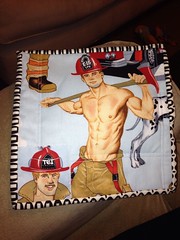
I couldn't believe it when I was out fabric shopping and found some firemen fabric. I bought it and set out making a mug rug. One side has firemen - the other side has chevron zig zags in red, blug and black.  Here is the front:
I used the part that had the hunky man on it and then sewed the mustache man in at the bottom.  She laughed so hard when I gave it to her and loved it.  She keeps the chevron side up at work (she is so much better behaved than me - I would totally have the guys face up) and peeks at the firemen side when days are bad or she just needs a jump start.  I was so happy to make this for her and so very happy that she loved it as much as she did!!


August 25, 2012

Memory Loss

I can't remember if I have shown you the mini quilt I made for the Doll Quilt Swap from Flickr.  This was my first true mini quilt that I did everything on: assembling, quilting and binding.  First binding ever.  Not too shabby for a beginner if I say so myself!!

Doll Quilt Swap - What I Mailed

Doll Quilt Swap - What I Mailed

August 24, 2012

Next WIP to complete

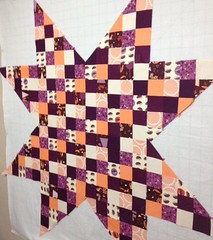
I started this quilt back with the quilt along. I did great until it was time to add the background shade. I chose a new background fabric twice as each did not quite fit well enough with the star.  Both times it WAY overpowered my star.  So, I put it away for awhile as I was frustrated and now I have brought it back out to see the light!!  Now, back to the same question I had a few months ago - what color to use?????

made in cherry2

I used a tangerine and that was way too bright. I had a lilac purple and it looked way out of place.  I have considered a dark eggplant purple.  What do you think? Any suggestions?  I want to try to stay away from white and cream.

August 23, 2012

Quilt for my Mother In Law

I can share this one block on here as I let my MIL already see it. Just as a sample and a teaser.  As long as I have been in the family (12 years now), she has been asking and hinting for a quilt and she loves red and white quilts. 

I went to my local quilt shop (well, an hour and half away) and they had a block of the month that fit perfectly!!  The pattern is Michael Miller Clubhouse and the fabric line is called Cottage.  I let my MIL choose from a couple different red/white quilts and she chose this one.  The club started late so we won't finish the block until January so it will be a late Christmas gift, but one I hope is worth waiting for.  Here is the first block:

debbie block

August 22, 2012

Gifts for the Husband

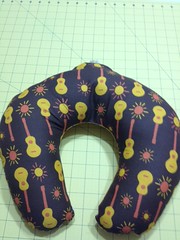
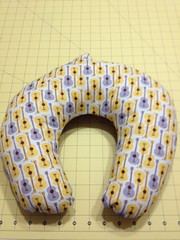
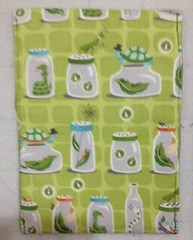
We went to Portland, OR in May for vacation. My husband had requested two items for this trip: a new neck pillow and a Nook holder.  I have to say that I almost stole his Nook holder.  I loved it, but it definitely describes him better, so I let him keep it!

bart pillow

Front of the neck pillow

bart pillow 2

The back

bart nook 2

Front of the nook cover

bart nook

The back


The best part is that he loved them and used them.  I love to see him using items I have made.  It makes me happy to be able to make things for him that he likes to use.
Hits Since January 9, 2009!

Free Hit Counter by Pliner.Net